Prepare Transparent Assets: Inspect, Feather and Outline the Real Shape
A transparent asset contains both color and coverage. A clean edge may legitimately include many semitransparent pixels; those pixels are not automatically defects. This workflow starts with an existing cutout. The downloadable 400 × 260 badge example demonstrates an outer alpha outline, not background removal.
Outline a Transparent Shape →Try a reproducible example
The 3 px black outline follows the alpha boundary with a square neighborhood. The canvas remains 400 × 260 and corners stay transparent. The checkerboard is the page background, not saved pixels.

400 × 260 px · 6,361 bytes
Download this file ↓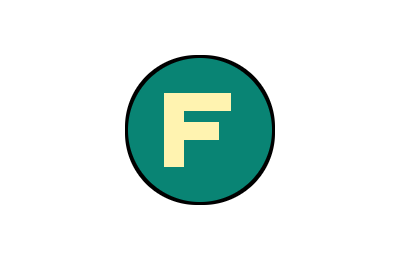
400 × 260 px · 8,410 bytes
Download this file ↓Processing settings
- Square stroke radius (px)
- 3
- Stroke placement
- Outside the shape
- Stroke color
- #000000
- Stroke opacity (%)
- 100
Created by Picvelio on 12 November 2026 from original synthetic artwork using the same code as the tools. Download the input, open the saved settings, then choose that file. File sizes are measured bytes; results with other inputs or browsers can differ.
Open these settings →1. Inspect coverage before changing the edge
Open Alpha Inspector with minimum alpha 1. The report separates fully transparent, semitransparent and opaque pixels and gives the bounding box of pixels meeting the threshold. Raising this threshold changes the reported bounds, not the image. A JPEG or a PNG with a baked-in checkerboard may be completely opaque even if it looks like a cutout.
Judge the image at 100% on a light and a dark background. Smooth antialiasing, glass, hair and shadows naturally use partial alpha. A high semitransparent count does not prove a bad export. The canvas-edge count describes partial-alpha pixels at the outermost rows and columns, not every object boundary; use it as a prompt to inspect possible clipping.
Inspect Image Transparency →2. Keep enough transparent working margin
Inspect the alpha channel when the checkerboard hides small gaps or isolated pixels. RGB beneath alpha zero is invisible and can contain arbitrary colors. Feathering and outlining weight neighboring colors by alpha so those hidden colors do not tint newly visible pixels. Existing visible color fringes are a separate problem and may require defringing or revisiting the cutout.
Keep the source at the intended editing resolution. For feathering with box radius r, leave room for up to 3r pixels of blur on each side; an outer square outline needs at least its radius in transparent margin. These tools do not enlarge the canvas. If the shape already touches the edge, first use an editor to add transparent margin or accept a cropped effect.
Extract Image Channels →3. Feather only when the contour is too hard
Start with box radius 1 px and strength 30–60%. The tool blends alpha with three separable box-blur passes. It keeps RGB for pixels that were already visible and extends alpha-weighted edge color into newly visible areas. This softens coverage without blurring the interior texture, and a fully opaque image stays unchanged.
Check narrow strokes, small holes and contact shadows after feathering. Coverage changes on both sides of the edge, so fine shapes can become weaker or spread together. Lower strength before increasing radius. A crisp pixel-art sprite may need no feathering at all. Save the result separately; softness cannot repair an inaccurate original selection.
Feather Transparent Image Edges →4. Outline the silhouette, not the canvas rectangle
The badge example uses its original transparent PNG with square stroke radius 3 px, outer placement, black (#000000) and opacity 100%. Download the original and use the saved settings link to reproduce it. The added stroke follows alpha boundaries, including internal holes; it is distinct from the Image Border tool, which frames the canvas.
The algorithm uses square dilation for the exterior or erosion for the interior, so corners follow a square neighborhood rather than a round vector offset. Outer mode adds coverage while keeping the original opaque center; inner mode recolors the edge without changing original alpha. On an entirely opaque photo, an inner stroke can follow the canvas edge and an outer stroke has no transparent space to fill. Choose stroke color against the actual destination background.
Outline a Transparent Shape →5. Export transparency and inspect the saved file
Keep a PNG editing copy, then try WebP for delivery if the target app accepts it. Compare the downloaded file at the intended display size and against both light and dark backgrounds. JPEG cannot store alpha: converting to JPG composites the shape onto a chosen background. That may be right for a form or print, but it is no longer a transparent asset.
Run Alpha Inspector on the final file when coverage matters, and compare the bounds with the edited PNG. Compression, resizing or the receiving app can change how a thin edge appears. Keep the original cutout and recorded settings. Processing is local and uses one still frame, with limits of 250 MB, 8192 pixels per side and 16 million pixels.
PNG to WebP →Before you use the result
- The file has real alpha; transparency is not a painted checkerboard.
- Semitransparent edges, shadows and glass were judged visually, not marked defective by their count.
- There is enough margin for feathering or an outer stroke, or edge clipping is intentional.
- The outline follows the intended silhouette and does not close required holes or weaken fine marks.
- The downloaded format preserves alpha when needed and has been checked on light and dark backgrounds.